
Adding custom formatting to all list views
One of the most exciting changes to SharePoint in the last few years is the advances in custom formatting of columns, views, and forms. These capabilities have transformed lists from functional tools that are pretty boring to exciting, dynamic, visual presentations of data with colors, icons, and almost anything you can design in HTML/CSS. By default, most of the custom formatting samples for columns are shown in a single view, but it is just few steps to make this formatting active in every view.
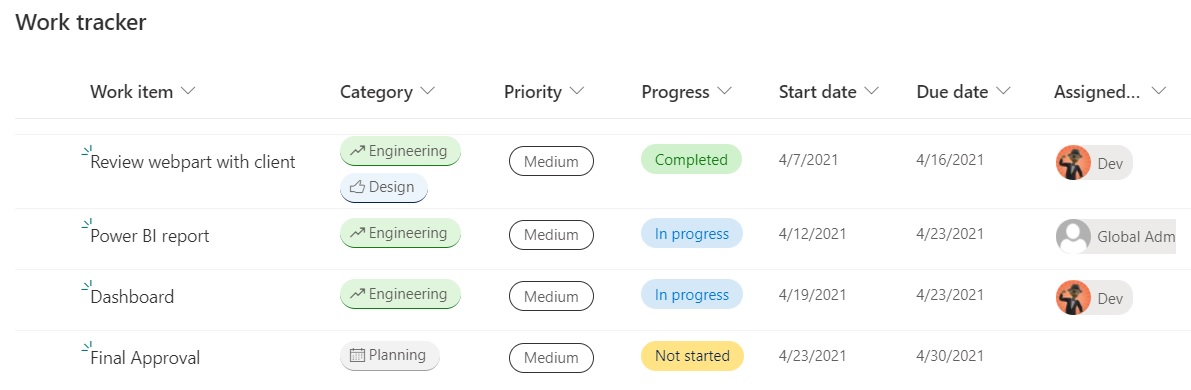
First, let’s find out how to create some custom formatting. I started with a Work Tracker list from the templates provided in Microsoft Lists and added some data about a project. As you can see from the image below, this template already has custom formatting in several columns. (Category, Priority, Progress, and Assigned to).
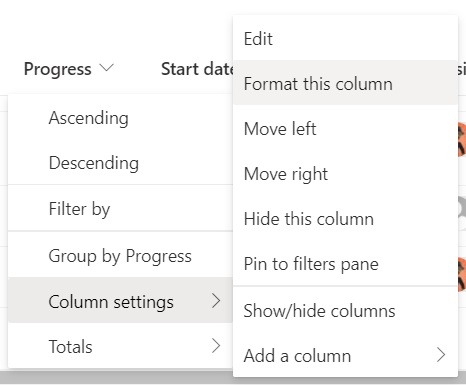
To see the custom formatting, click the down chevron next to a column, choose Column settings, Format this column.
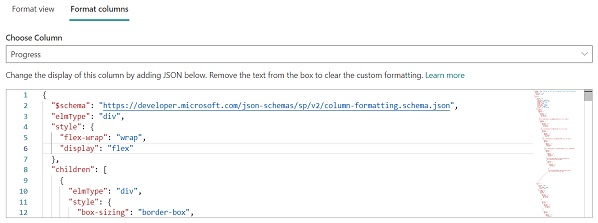
On the resulting screen, the pre-built styles are available, but the part we want to dig into is in the Advanced mode at the bottom of the screen. On this screen, we can see and edit the custom JSON to control the custom formatting. In the Progress column, shown below, there are 285 lines of JSON to build the custom pill formatting used for the column. At first glance, it looks very intimidating, but once you start studying how this JSON is built, you will find that it’s just a JSON representation of the nested HTML and CSS that all webpage developers are familiar with.
Now that we know where to apply custom formatting, let’s find out how. Once you become familiar with how to build this JSON, you will be able to build from scratch on your own, but first, let’s find some shortcuts. The primary place to find examples of custom formatting samples in the the PnP community (aka.ms/m365pnp), a joint effort between Microsoft and the open source community. One of the sample areas is focused entirely on custom list formatting (List Formatting Samples). From here, you can access hundreds of samples that can be searched and easily used with a simple copy/paste operation. Today, I am looking to add colors to my Due Date field to help identify work items that are not on-track to be completed on time using a Red-Yellow-Green theme. By searching for “ryg” I found the sample I will use with a little modification. If can be found here: text-ryg-status-indicator
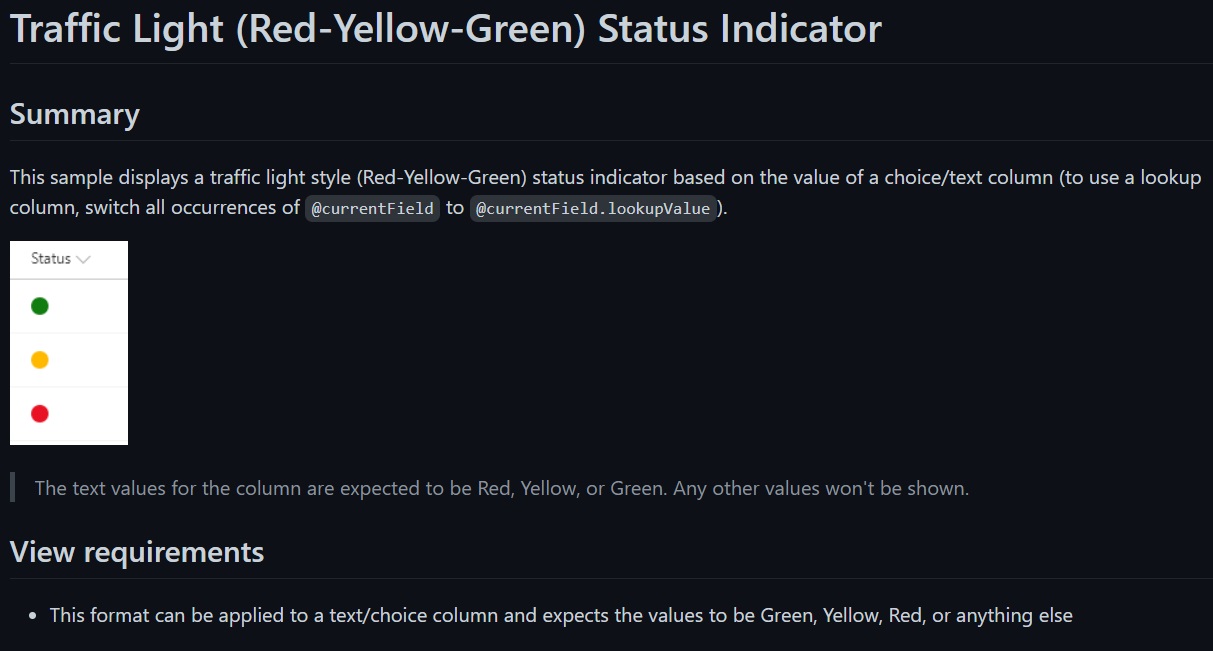
As you can see, this format depends on the value of the field to be Red, Yellow, or Green in order to work, so we’ll change that to work with our date field. Below is the JSON provided in the sample, where we will start our customization.
{
  "$schema": "https://developer.microsoft.com/json-schemas/sp/column-formatting.schema.json",
  "elmType": "div",
  "children": [
    {
      "elmType": "span",
      "style": {
        "width": "14px",
        "height": "14px",
        "border-radius": "50%"
      },
      "attributes": {
        "class": "=if(@currentField == 'Green', 'ms-bgColor-green', if(@currentField == 'Yellow', 'ms-bgColor-yellow', if(@currentField == 'Red', 'ms-bgColor-red', '')))"
      }
    }
  ]
}
My goal is to change the Due Date background to Red if the Due Date has passed and the Progress is not Complete and to Yellow if the Start Date has passed and the Progress is Not Started. The best way to accomplish this is by editing the JSON in the Advanced mode screen and pressing preview until you get it just right. Here is my resulting JSON.
{
  "$schema": "https://developer.microsoft.com/json-schemas/sp/column-formatting.schema.json",
  "elmType": "div",
  "children": [
    {
      "elmType": "span",
      "style": {
        "color": "white",
        "padding": "5px 10px",
        "border-radius": "10px"
      },
      "attributes": {
        "class": "=if([$Progress] == 'Completed', 'ms-bgColor-green', if(@now > @currentField, 'ms-bgColor-red', if([$Progress] == 'Not started' && @now > [$StartDate],'ms-bgColor-yellow','ms-bgColor-green')))"
      },
      "txtContent": "@currentField"
    }
  ]
}
The key part is the “class” where I based the background color on the value of the Progress field and comparing the Start Date and Due Date to now. Here is the resulting view of the list, based on today’s date being 4/26/2021.
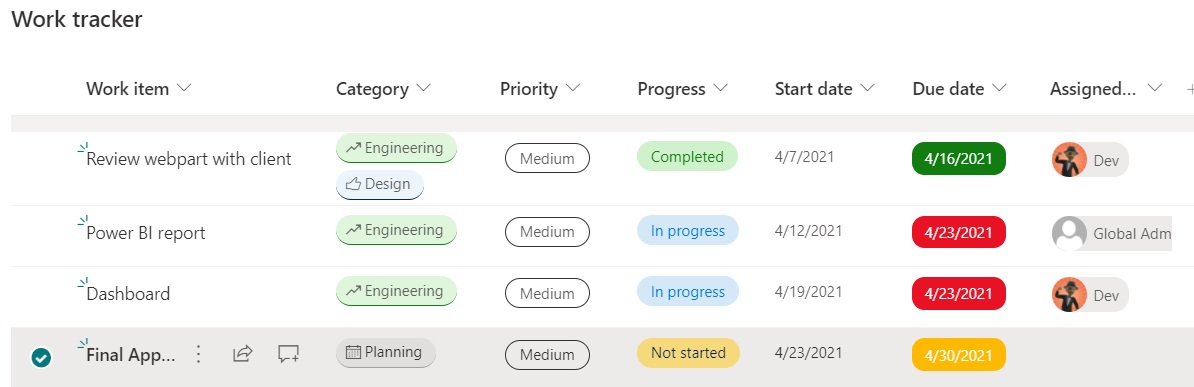
Now we have the format the way we want it, but will this work in any of the other views for the list? When I started this post, I thought the answer to that question would be no and I was prepared to walk through the steps to make it available. Somewhere along the way, Microsoft changed how these custom formatting settings are stored. They are now being added automatically to the column definition instead of just in the view. You can verify this by going to the List Settings, select the Due Date field, and scroll to the bottom of the properties. There you will find a Column Formatting property with the JSON we just saved into the All Items view. By having the JSON here, it follows your column where ever it is displayed, even in the New and Edit item forms. Brilliant!
So, Microsoft’s change has saved you some reading! I really encourage you to try out this formatting stuff. It’s really not hard with all the samples available. In the video archives of demos given by fellow MVP and List formatting King Chris Kent, you can see how diverse the capabilities are and how simple they are to implement. PnP List Formatting Demos
More Resources
- Use column formatting to customize SharePoint
- PnP List Formatting
- PnP List Formatting Samples Repo
- PnP Home
- The List Formatting King’s blog: The Chris Kent